Welcome back, gang! In my first blog, I covered the basics of the Pokémon TCG. This week, I’m going to dive into the deck I use at every local tournament I attend. If I have enough time, I’ll also share some details about a tournament I participated in last night.
The Ancient Box Deck
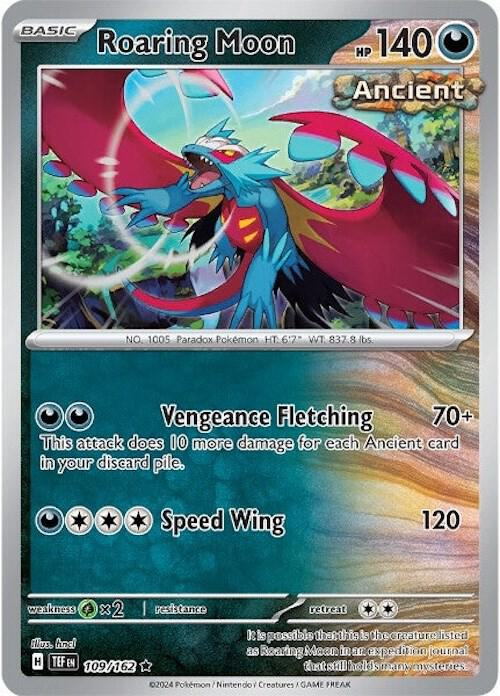
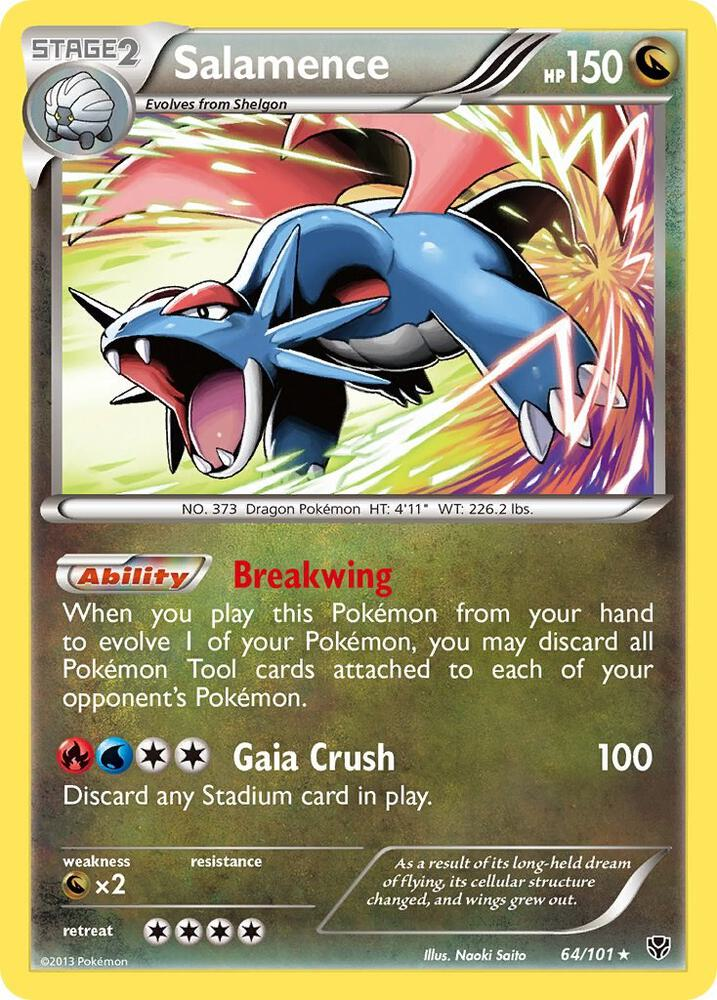
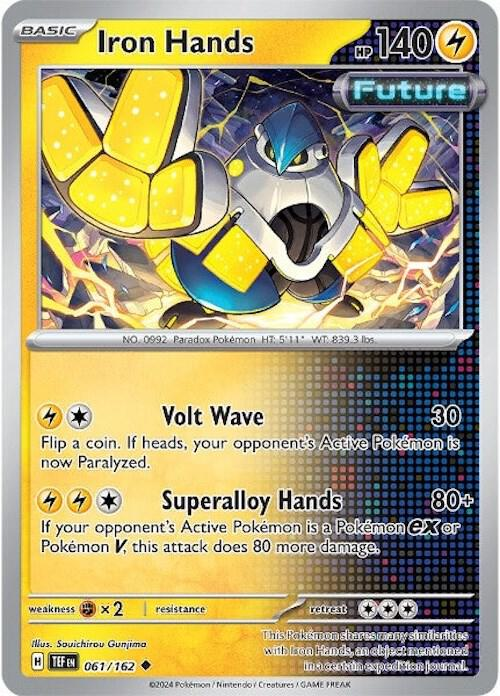
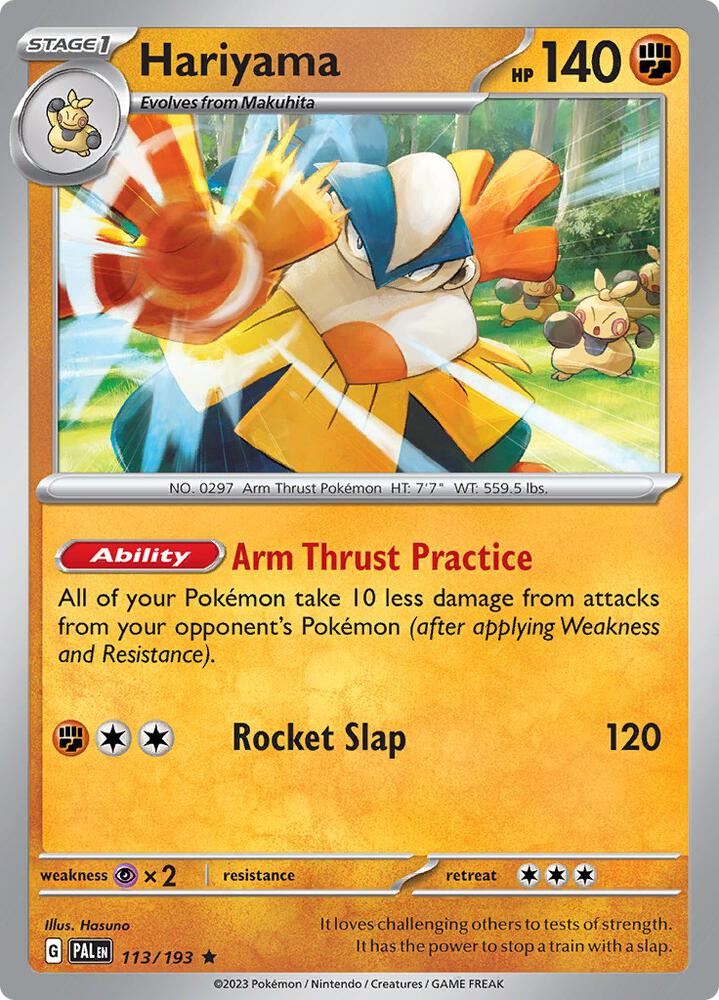
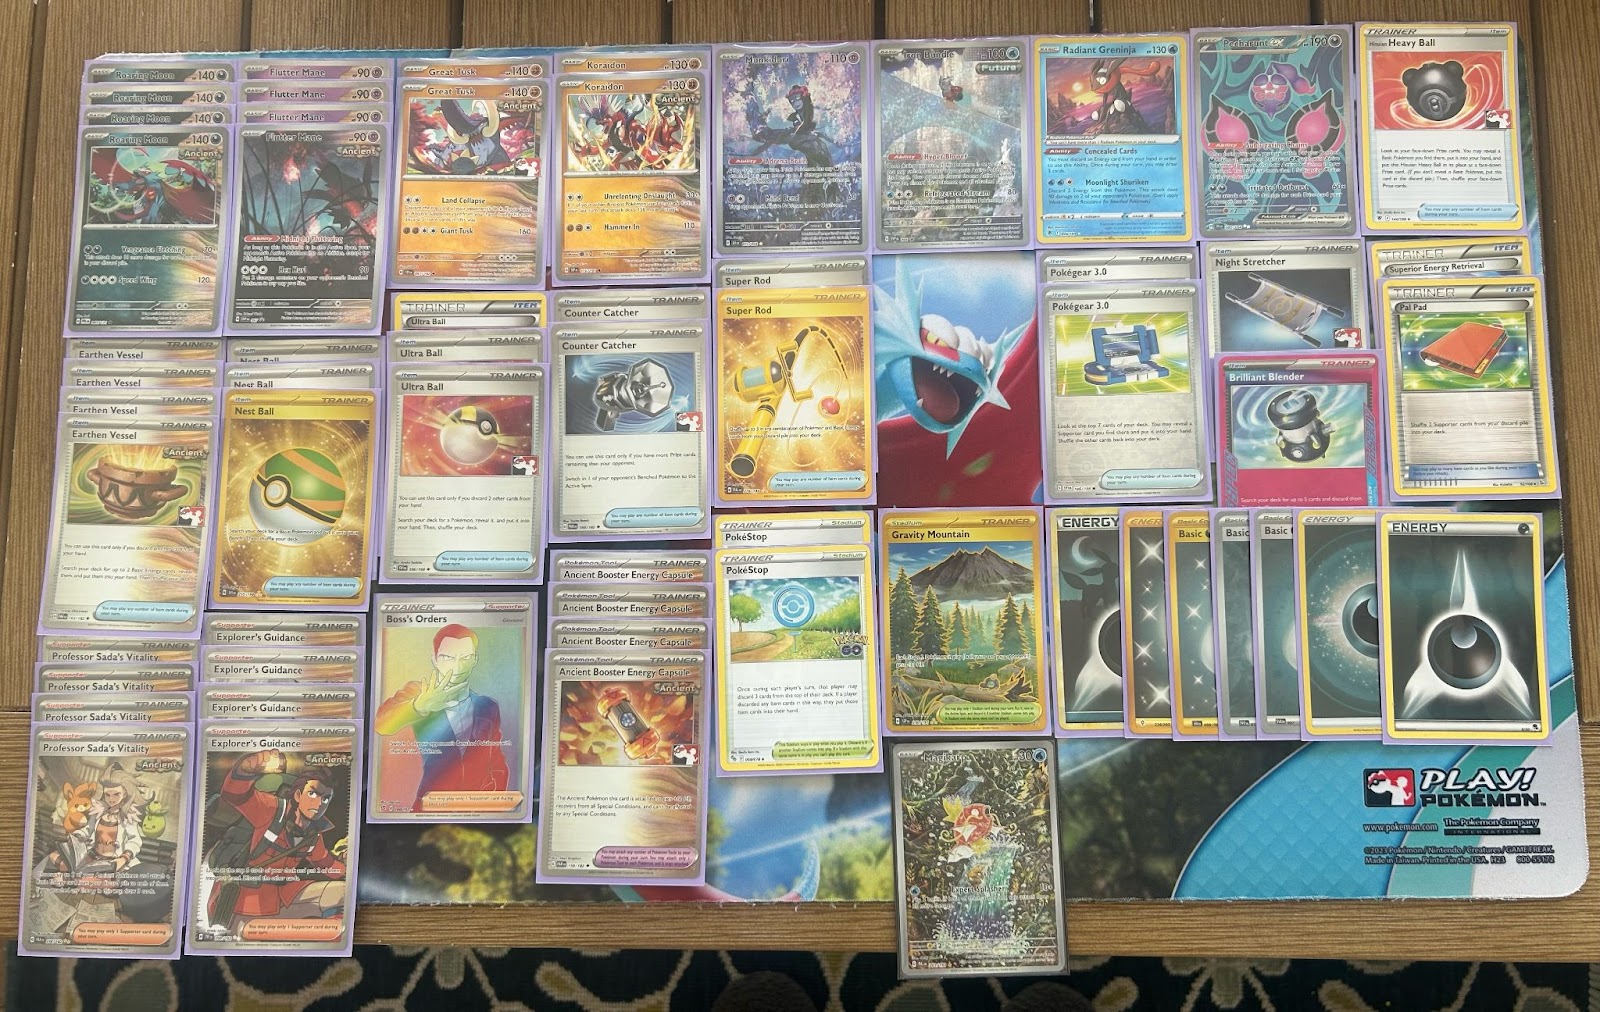
The deck I use is often referred to as “Ancient Box.” The name comes from the fact that 28 out of the 60 cards in my deck are "Ancient" cards. These cards feature a special stamp in the top right corner, marking them as either Ancient or Future versions of Pokémon introduced in Scarlet and Violet. For example, Roaring Moon is the Ancient version of Salamence, while Iron Hands is the Future version of Hariyama. I’ll include some photos of these cards below for reference.
The Strategy Behind the Deck
The reason for focusing on Ancient cards is because of Roaring Moon's attack, Vengeance Fletching. This attack does 70 damage by default, but it gets stronger based on how many Ancient cards are in my discard pile. Specifically, it deals 10 more damage for each Ancient card that has been discarded. For instance, if I manage to discard all 27 of my Ancient cards (while keeping one Roaring Moon on the field), I can deal a massive 340 damage—enough to knock out any Pokémon in the game. However, reaching this damage output is extremely challenging, as it requires careful planning and setup during the match.
To make this happen, I rely on key abilities and stadium cards to help me cycle through the deck and discard those Ancient cards efficiently.
Supporting Abilities & Stadiums
Radiant Greninja
One of the most important supporting Pokémon in my deck is Radiant Greninja. Its ability, Concealed Cards, allows me to discard an energy from my hand to draw two cards once per turn. This is crucial because drawing cards is vital to finding the necessary pieces to discard those Ancient cards. Additionally, having energy in the discard pile is important, but I’ll get into that in a moment.Pokéstop Stadium
Another cornerstone of my deck is the Pokéstop stadium. It allows both players to discard the top three cards of their deck and, if any Item cards are discarded this way, put them into their hand. This helps me discard unnecessary Ancient cards (like Flutter Mane, Great Tusk, and Koriadon) which is especially useful since these cards are mostly there for their discard value rather than their in-play abilities. Pokéstop also lets me find important Items to help me continue discarding or setting up for the next turn.Gravity Mountain Stadium
The second stadium in my deck is Gravity Mountain. It reduces the HP of each Stage 2 Pokémon in play (both yours and your opponent’s) by 30. Since Stage 2 Pokémon generally have large HP pools, this stadium helps knock out big threats like Charizard EX (which has 330 HP). It makes it much easier to reach the necessary damage threshold, especially once I've discarded all available ancient cards.
Single-Prize Pokémon Advantage
One thing that sets Ancient Box apart from most other decks is the heavy reliance on Single-Prize Pokémon. As I mentioned in my previous blog, EX Pokémon are worth 2 prize cards each. In my deck, I only run one EX Pokémon, which is rarely used. This means my opponent must take out 6 Pokémon to win, while I only need 3 knockouts. This provides me with a lot of flexibility—allowing me to fall behind in prize cards and still come back to win.
For instance, I can let my opponent take up to 3 prize cards before I even take my first. This strategy can lead to a comeback later on, especially when my Roaring Moon is primed to deal massive damage. In some matchups, like against Chien-Pao EX, which only has 220 HP, I can take advantage of the lower HP and quickly discard just 15 Ancient cards to reach the necessary damage for an OHKO.
SADA!!!
Finally, Professor Sada’s Vitality is the most important supporter in the deck, right alongside Roaring Moon. It reads, “Choose up to 2 of your Ancient Pokémon and attach a Basic Energy card from your discard pile to each of them. If you attached any Energy in this way, draw 3 cards.” This card is critical because it allows me to accelerate Energy and set up attacks in a single turn.
The combination of Professor Sada and Radiant Greninja helps keep my hand full while allowing me to discard and accelerate Energy, making Roaring Moon's big attacks possible. It's BROKEN, allowing me to continually cycle through my deck, set up attackers, and keep the pressure on my opponent.
Tournament
I'm going to break down a few of the key matchups I played against last night but not all.
Round 1: Facing Off Against Lugia VSTAR
In the first round of the tournament, I matched up against Lugia VSTAR. Unfortunately, this is not an ideal matchup for me.
Lugia VSTAR has a strong ability called Summoning Star, which allows them to bench up to two Colorless Pokémon from their discard pile (once per game). This is huge because it lets them skip over the basic and Stage 1 evolution stages, often bringing out Archeops—a Stage 2 Pokémon—directly from the discard pile. Archeops has the ability to search the deck for two Special Energy cards and attach them to a Pokémon, meaning that Lugia players can essentially get four energy attachments for free on each turn if they bench two Archeops. (Special energy often only provides colorless energy but has added benefits such as drawing cards when knocked out, and preventing effects of attacks)
The real trouble for me in this matchup lies in Lugia's attackers. One of the main threats is Iron Hands with its attack "Amp You Very Much". This attack allows Lugia VSTAR to knock out my Radiant Greninja, which results in them taking two prize cards. Since Radiant Greninja is such a key card for cycling through my deck, losing it early is a major setback.
Another issue is Cincinno, the Stage 1 Pokémon with the attack "Special Roll." This attack does 70 damage for each Special Energy attached to Cincinno, which means it can easily take out my Roaring Moon (140 HP) in just one hit.
To make matters worse, Lugia VSTAR plays the ACE SPEC card Legacy Energy, which reduces the number of prize cards an opponent takes when the Pokémon attached to it is knocked out. Players often attach this to Iron Hands, which means when Iron Hands is knocked out, I only take one prize card instead of two—this gives them an advantage in the prize trade.
Lugia players love going first so they can establish archeops in the discard pile and be able to evolve their lugia on turn 2. So I won the flip and went first even though I always want to go second. Now that you understand how tough this matchup is, here's how I managed to pull off the win.
Luckily for me, Lugia VSTAR is a Stage 1 Pokémon, meaning it has to evolve from Lugia V. On my opponent’s first turn, they passed without benching a Lugia V, giving me a two-turn head start before they could even begin attacking.
During this time, I used my ACE SPEC, Brilliant Blender, which allowed me to search my deck for five cards and discard them, instantly boosting my damage by 50. This was a game-changing move as it helped me build momentum early.
Additionally, my opponent prematurely benched their Iron Hands, not realizing that they wouldn’t be able to set it up for another turn or two. They also failed to attach Legacy Energy, which would have been a crucial play for them. I capitalized on this by playing Boss's Orders, which allowed me to target and knock out their Iron Hands before they became a real threat.
With Iron Hands out of the way, I had a two-prize advantage, and from there, I was able to clean up the rest of the game without any issues. The early lead gave me enough breathing room to manage the rest of the match and secure the win.
Round 2: Facing Lucas’ Deck
Since most of you are already familiar with Lucas' deck from his blog, I won’t need to explain it in detail. This matchup is usually pretty favorable for me, unless my opponent can pull off multiple two-prize turns with Iron Hands. I also have an unfair amount of practice against this deck because I’ve played Lucas so many times. Sometimes when I skunk a miraidon player I feel the need to tell them that.
The game started a bit shaky for me, and my opponent was able to set up Iron Hands and knock out my Radiant Greninja, taking two prize cards. To make things worse, they had a Bravery Charm attached to their Iron Hands, boosting their HP from 230 to 280. This was problematic for me, as I needed to hit that 280 HP threshold to knock out Iron Hands, which was no easy feat.
Without being able to take down Iron Hands right away, I had to pivot and target their Mew EX instead to secure two prize cards. Luckily, there was nothing else on my side of the board that could give up two prize cards, so I didn’t lose any more ground.
I kept chipping away, building up damage over time, and eventually, I was able to reach the necessary 280 damage to finally take down Iron Hands. At that point, I had the last Roaring Moon I needed fully set up on the bench, ready to take out anything left on their board for my last two prize cards.
With the game now in my favor, I managed to clean up the remaining Pokémon on their side and secure the win.
Round 3: Facing Raging Bolt
This was yet another matchup that felt like a breeze for me. If you ask Q how his game went when he played Raging Bolt against Ancient Box, you'll get a pretty good idea of how this one unfolded.
Raging Bolt is a basic EX Pokémon that relies on discarding energy attached to your Pokémon for damage. Its attack, Bellowing Thunder, does 70 damage for each energy discarded from your Pokémon. Teal Mask Ogerpon EX pairs perfectly with Raging Bolt, thanks to its ability, Teal Dance, which lets you attach an energy to Ogerpon and draw a card. Raging Bolt is essentially a "Turbo" deck that relies on getting the first two prize knockouts and applying pressure.
Unfortunately for Raging Bolt, my deck is its hard counter. When Raging Bolt can only take one prize card per turn, it doesn’t stand a chance, and the deck crumbles quickly. To make matters worse for my opponent, he bricked.
I won the coin flip and decided to go second. My opponent started by going first, drawing a card, attaching an energy to his Fezandipiti EX (which wasn’t going to be an attacker anyway—just there for later card draw), and passing.
I then took my turn, setting up my Roaring Moons and discarding every Ancient card in sight. By the end of my turn, I wasn’t quite able to attack yet, so I passed. My opponent drew his card for the turn, attached an energy for the turn, glanced at me, and passed right back.
He later told me that, at that point, his hand consisted of two Professor Sada’s Vitality, one Boss’s Orders, two Grass Energy, one Switch Cart, and one Iron Bundle. That hand was awful. He had no way to draw a new hand and was essentially stuck. To prevent an immediate loss if I KO'd Fezandipiti, he benched Iron Bundle but didn’t have much else to work with. So, he passed again.
I took my turn, did what I needed to do, and knocked out Fezandipiti EX. My opponent drew his card for the turn, and it was Briar, an utterly useless supporter in this situation. He realized it was over, packed it up, and gave me the win.
Round 4: Lost Zone Box
I’m not going to waste time explaining this matchup. FUCK LZB. If you’re curious about how it works, go check out Lucas’s blog. All you need to know is that I won. That’s 4-0.
Round 5: Lost Zone Box
Once again, FUCK LZB. Unfortunately, I lost this one, which meant I ended the night 4-1. Despite the loss, I secured 2nd place and walked away with $55 in store credit.
Thank you so much for joining me on this journey through Wednesday night locals at Oblivion Games in Leto, FL. It was a blast, and I hope you enjoyed the ride as much as I did!
Below is a photo of my 60-card decklist. I encourage you to guess which card is worth $275.
No comments:
Post a Comment